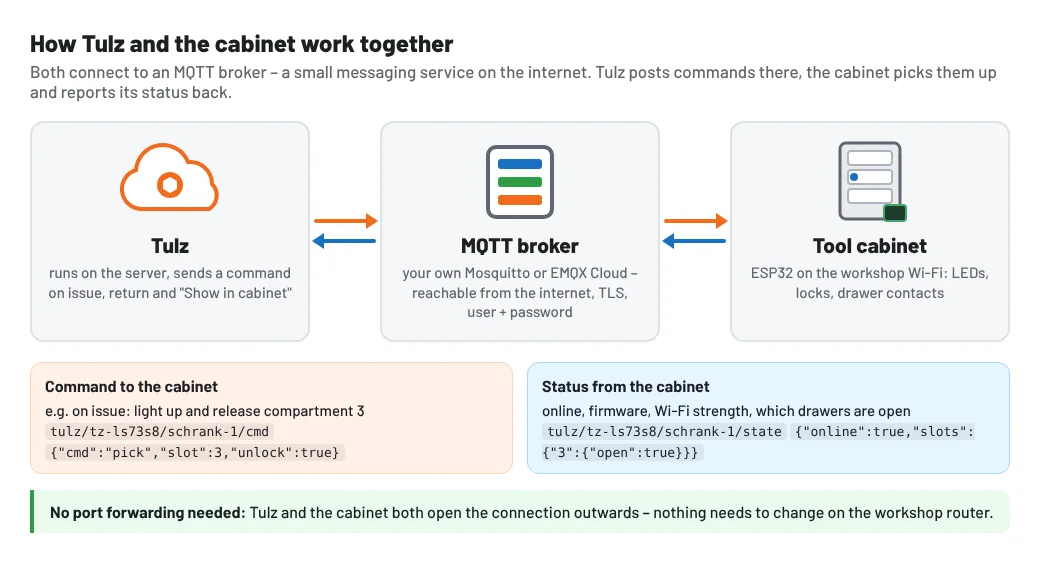
Your own "smart" tool cabinet – without a storage lift: every time a tool is issued, the LED at its drawer lights up and an electric lock releases the compartment; on return, the LED shows where the tool belongs. A small controller sits in the cabinet for this (ESP32, parts for about €40–120 per cabinet). Tulz and the cabinet talk to each other through an MQTT broker – a small messaging service on the internet.
A lit-up cabinet in 8 steps
- Create storage locations for the cabinet and its drawers
- Choose an MQTT broker – nothing to set up with the Tulz broker
- Enter the broker in Tulz
- Create the cabinet
- Assign the compartments to the drawers
- Get the parts and wire them up
- Download the firmware and load it onto the ESP32
- Test the connection
The part in Tulz takes about 10 minutes, broker and firmware about 30 minutes the first time, and the wiring one to two hours depending on the cabinet.
Step 1: Storage locations for cabinet and drawers
Under Administration → Storage locations, create the cabinet as a storage location (e.g. "Cabinet 1 Hall 2") and below it one sub-location per drawer ("Drawer 1" to "Drawer 8"). Each tool gets its drawer as storage location – or a place below it such as "Drawer 3 › left", which counts automatically. If your storage locations are already set up like this, you are done here.
Step 2: Provide an MQTT broker
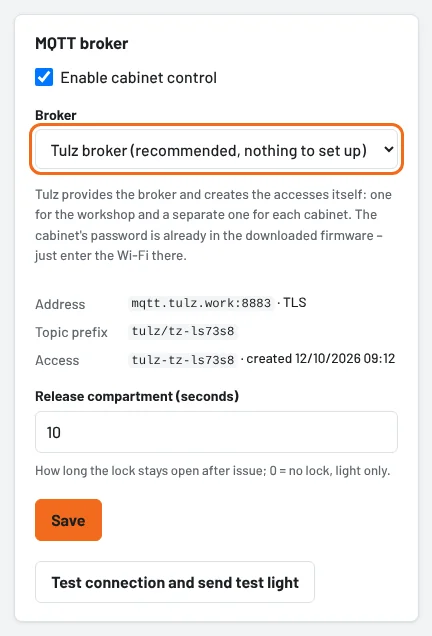
Easiest: the Tulz broker. If Settings → Cabinet control shows the Broker field with "Tulz broker", Tulz provides the broker. Then there is nothing to do in this step – continue with step 3. Tulz creates one access for your workshop and a separate one for each cabinet; the cabinet's password will already be in the firmware.
Only without this field, or with your own broker, continue here: Tulz runs on the internet, the cabinet in your workshop. Both connect to the broker on their own – so the broker must be reachable from the internet, while nothing needs to be opened on the workshop router. Tulz does not accept addresses in the internal network (e.g. 192.168.…).
Option A – a broker in the cloud (fastest), e.g. EMQX Cloud: the Serverless plan includes a free quota every month (1 million session minutes, 1 GB of data) – a cabinet connected around the clock needs about 45,000 minutes a month.
- Create an account on emqx.com and choose New Deployment in the console, plan Serverless.
- Leave the Spend Limit at 0 – then only the free quota is used and nothing is charged. Enter a name, accept the terms, Deploy.
- On the left, Access Control → Authentication → Add: create a username (e.g.
tulz-schrank) and a long password. - Under Overview, the connection information shows the broker address and port
8883(always encrypted); the CA certificate can be downloaded there as well.
New free brokers can no longer be created at HiveMQ Cloud. In principle, any MQTT broker that is reachable from the internet and offers TLS on port 8883 will do.
Option B – your own Mosquitto on a server: install the mosquitto package, create a user with mosquitto_passwd -c /etc/mosquitto/passwd tulz-schrank and add to the configuration (e.g. /etc/mosquitto/conf.d/tulz.conf):
listener 8883certfile /etc/letsencrypt/live/mqtt.your-domain.com/fullchain.pemkeyfile /etc/letsencrypt/live/mqtt.your-domain.com/privkey.pemallow_anonymous falsepassword_file /etc/mosquitto/passwd
Open port 8883 in the server firewall and restart Mosquitto. Mosquitto must be allowed to read the certificate files. The user only needs rights on the company's topic prefix (default tulz/<company number>).
Step 3: Enter the broker in Tulz
With the Tulz broker:
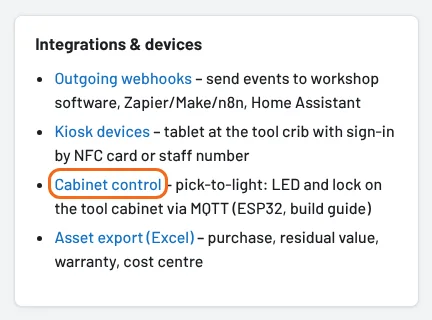
- Open Settings and click Cabinet control in the Integrations & devices section.
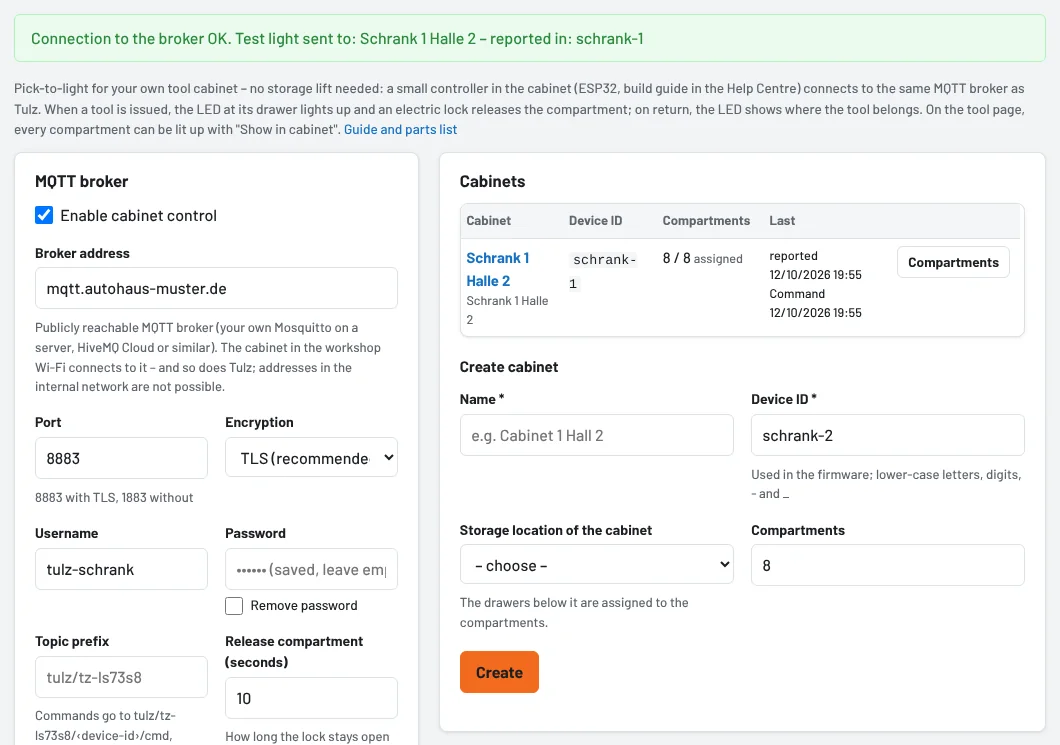
- Tick Enable cabinet control, choose "Tulz broker" under Broker and set Release compartment (seconds) (0 = no lock, light only).
- Save – Tulz creates the access and shows it with address and topic prefix. Done, continue with step 4.
With your own broker:
- Open Settings and click Cabinet control in the Integrations & devices section.
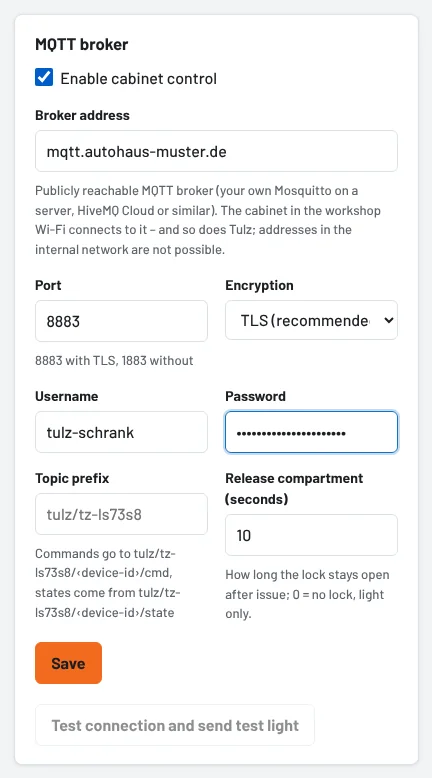
- Tick Enable cabinet control (if there is a Broker field, choose "Own broker" there) and enter: Broker address (just the name, without
mqtt://and without port), Port 8883, Encryption "TLS (recommended)", Username and Password of the broker. - Leave the Topic prefix empty – then
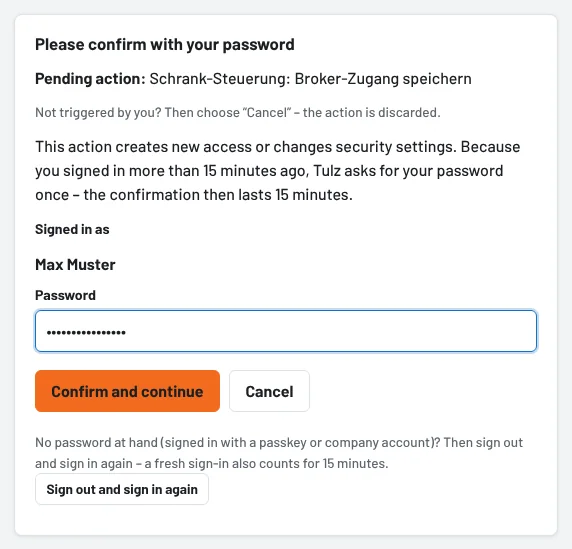
tulz/<company number>applies. Release compartment (seconds): how long a lock stays open after issue; 0 = no lock, light only. - Save. Tulz asks for your own password once, because access data is being stored. The broker password is then stored encrypted in Tulz; the field stays empty ("saved, leave empty = keep").
Step 4: Create the cabinet
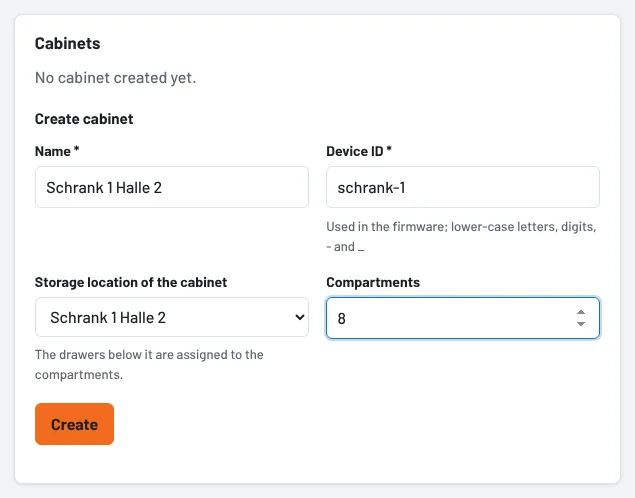
On the right under Create cabinet:
- Name – anything you like, e.g. "Cabinet 1 Hall 2"
- Device ID – e.g.
schrank-1(lower-case letters, digits, - and _). It goes into the firmware later; do not change it after flashing, or Tulz will no longer find the cabinet. - Storage location of the cabinet – the location from step 1
- Compartments – number of drawers or LEDs (up to 64; locks and contacts up to 8 per ESP32)
Create opens the cabinet's page. With the Tulz broker, the cabinet automatically gets its own access.
Step 5: Assign the compartments to the drawers
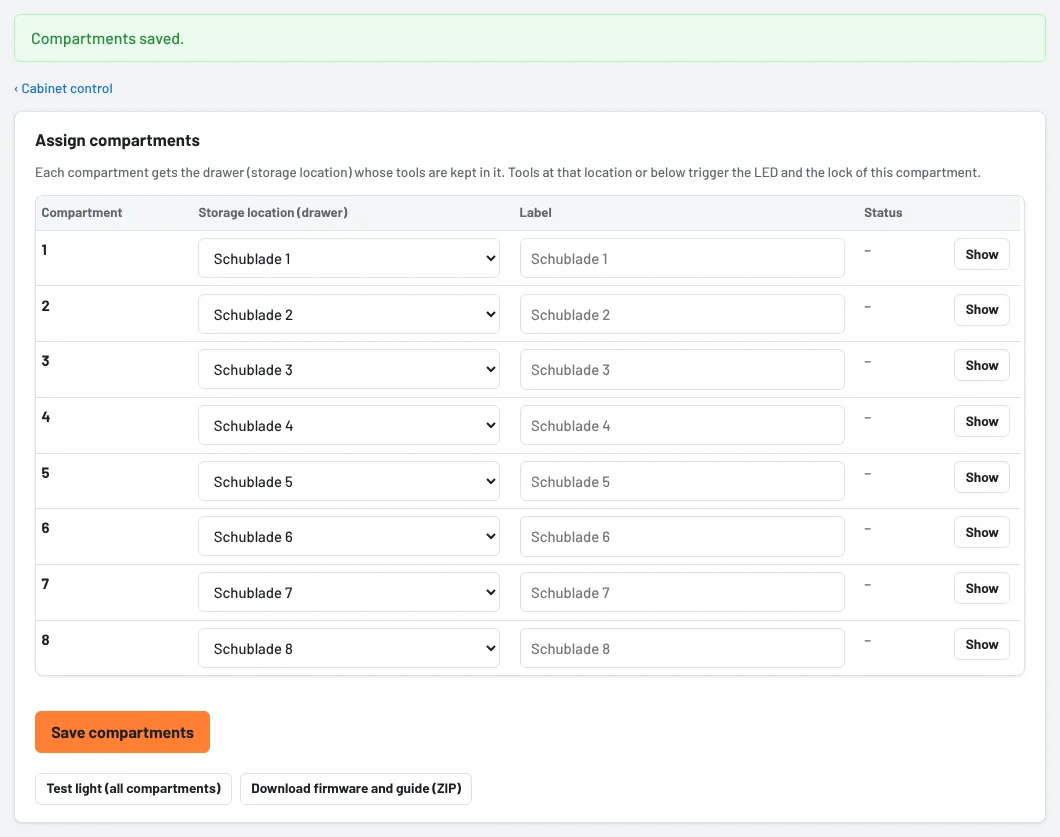
On the cabinet page, choose the matching drawer for each compartment and click Save compartments. Compartment 1 is the first LED on the strip, compartment 2 the second, and so on. Tools in the drawer or in a place below it trigger the compartment – you do not change anything on the tools themselves. The Label is optional (otherwise the drawer's name is used).
Step 6: Parts and wiring
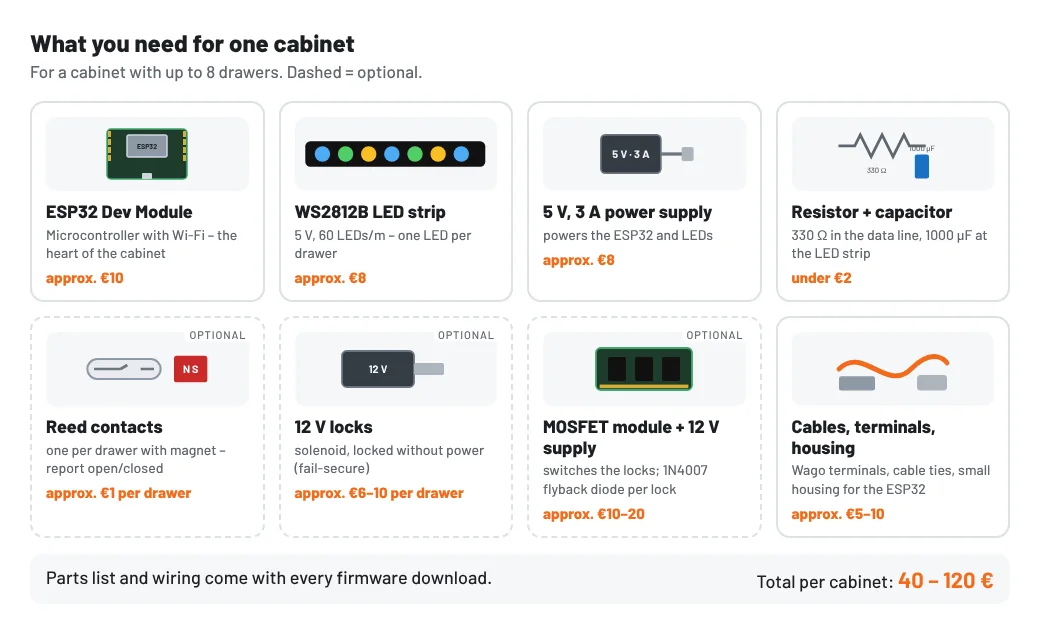
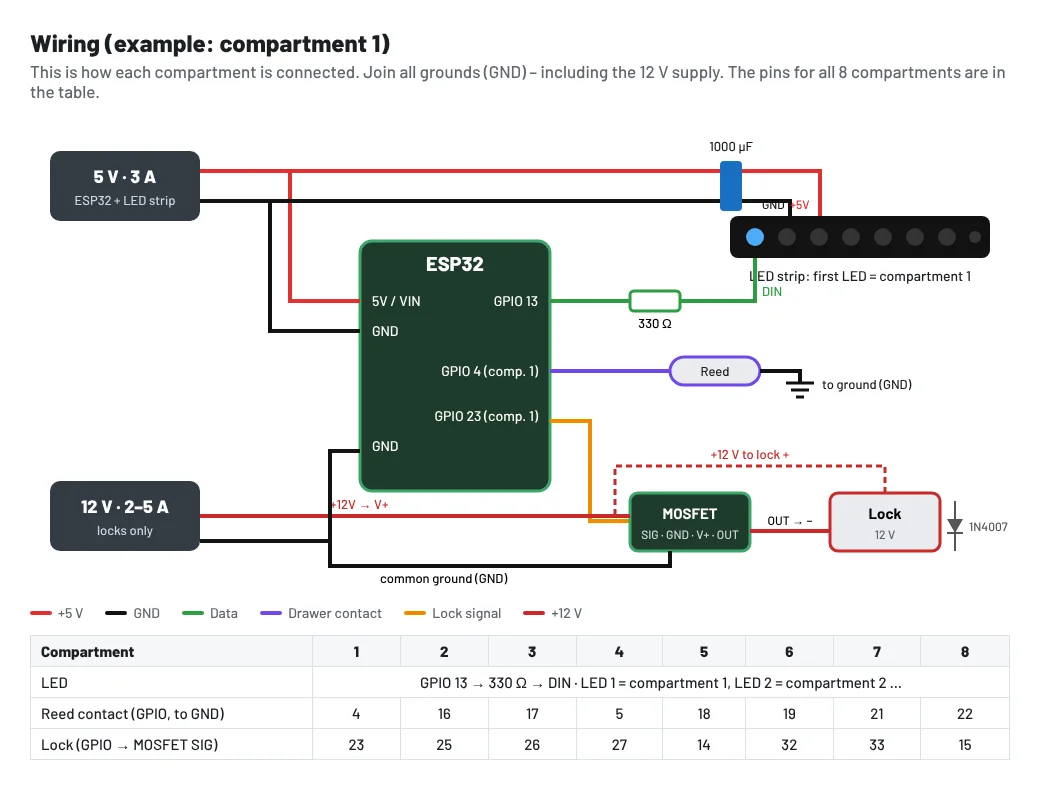
- Power: 5 V supply to the ESP32 (5V or VIN and GND) and to the LED strip (+5V, GND). Put the 1000 µF capacitor directly at the strip between +5V and GND (negative side to GND).
- LEDs: GPIO 13 through the 330 Ω resistor to DIN of the strip. Mind the arrow direction on the strip. The first LED belongs to compartment 1 – lay the strip in compartment order.
- Drawer contacts (optional): one reed contact per drawer between the pin from the table and GND, the magnet on the drawer – with the drawer closed, the contact is closed.
- Locks (optional): one MOSFET module per lock: SIG to the pin from the table, GND to GND, V+ to +12 V. The lock goes between +12 V and OUT, plus a 1N4007 flyback diode in parallel with the lock (ring towards +12 V). Choose fail-secure locks: without power they stay locked.
- Ground: connect all GNDs – 5 V supply, 12 V supply and ESP32.
Do not use: GPIO 0, 2 and 12 (boot pins), 6–11 (flash); 34–39 are input-only without pull-up. The ESP32 only supports 2.4 GHz Wi-Fi.
Step 7: Flash the firmware
- On the cabinet page, click Download firmware and guide (ZIP). The ZIP contains the program
tulz-schrank.ino, the guideLIESMICH.txtand the pin assignmentVerdrahtung.txt(in German). - Install the Arduino software (Arduino IDE 2) from arduino.cc. Under File → Preferences → Additional boards manager URLs enter
https://raw.githubusercontent.com/espressif/arduino-esp32/gh-pages/package_esp32_index.json, then install "esp32" (Espressif Systems) under Tools → Board → Boards Manager. - Under Tools → Manage Libraries install: PubSubClient (Nick O'Leary), ArduinoJson (Benoît Blanchon, version 7) and Adafruit NeoPixel.
- Open
tulz-schrank.ino. The lines marked orange have already been filled in by Tulz – do not change them. You enter the green ones yourself: Wi-Fi name, Wi-Fi password and the broker password – with the Tulz broker the password is already in it, then just the Wi-Fi. - Connect the ESP32 via USB, choose "ESP32 Dev Module" and the port under Tools → Board, click Upload (arrow). If the upload hangs at "Connecting…", briefly hold the BOOT button on the ESP32.
- Open Tools → Serial Monitor (115200 baud): it shows "MQTT verbunden" (MQTT connected). On start-up, a short running light passes over all compartments.

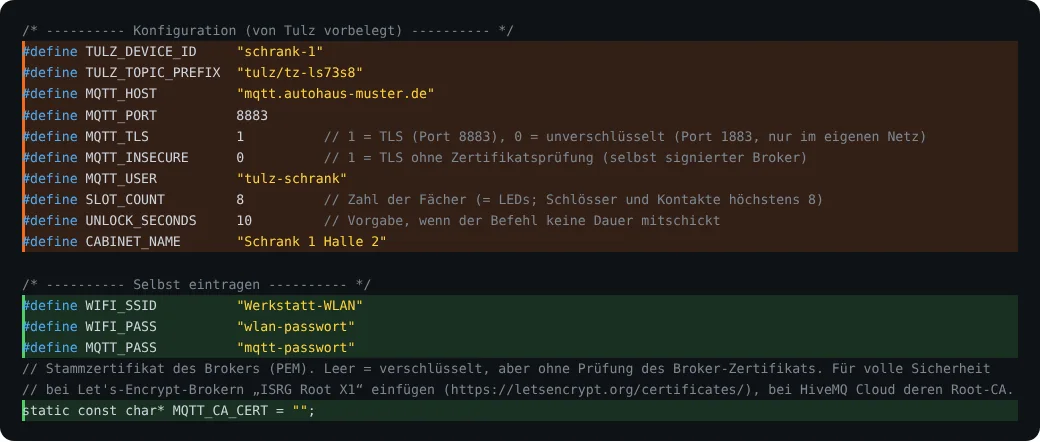
Without a root certificate (MQTT_CA_CERT), the cabinet connects encrypted but does not check the broker's certificate. For full security, insert the root certificate – for Let's Encrypt certificates "ISRG Root X1" (letsencrypt.org/certificates), for EMQX Cloud the CA certificate from the connection information.
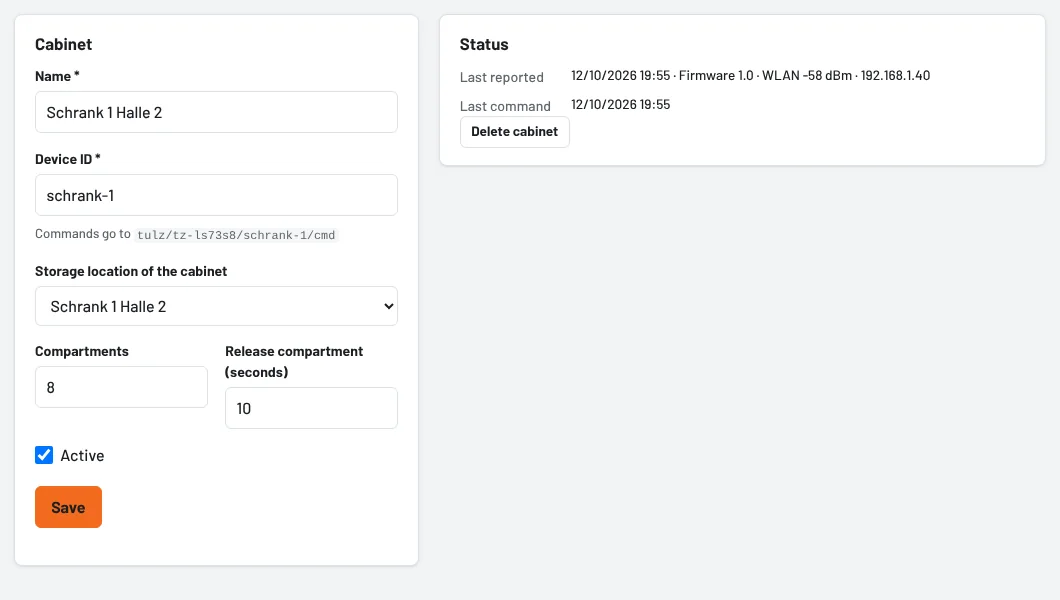
With the Tulz broker, the firmware contains the cabinet's password. That is why Tulz asks for your own password once before the download – do not pass the file on. If a cabinet was lost or the file got into the wrong hands: on the cabinet page under Status, click Generate new password, then download and flash the firmware again. The old password stops working immediately.
Step 8: Test the connection
Back in Tulz: Settings → Cabinet control → Test connection and send test light. Tulz connects to the broker, all compartments light up one after another, and every cabinet reports back. On the cabinet page, Status shows when it last reported, with firmware, Wi-Fi strength and IP address; the table shows for each compartment whether the drawer is open or closed. Show lights up a single compartment for 15 seconds – this way you check that each LED sits at the right drawer.
In everyday use
- Issue – whether in the issue form, via pick list, at the kiosk or on the phone: the compartment lights up blue and is released for the set time. The message in Tulz names cabinet and compartment.
- Return – also by scan or at the kiosk: the compartment lights up green – put the tool back there. "Put back in" is shown as well.
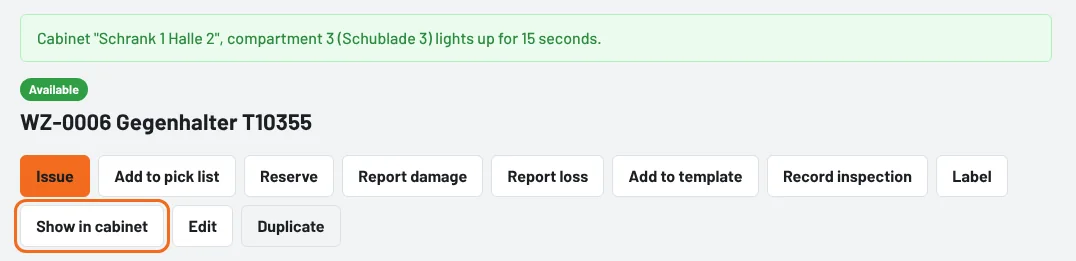
- Tool page → Show in cabinet – the compartment lights up yellow for 15 seconds. The button only appears for tools whose storage location is assigned to a compartment.
- Drawers open – with contacts, the cabinet page shows which drawers are currently open.


Commands go out in the background after the booking – issuing never waits for the cabinet. If the broker cannot be reached, the booking still counts; the error is shown in the cabinet list and at the top under Last error. Several cabinets per site are possible, each with its own device ID.
If something does not work
| Message or observation | What to do |
|---|---|
| "Broker-Adresse nicht auflösbar" (address cannot be resolved) | Check the address – just the name, e.g. mqtt.autohaus-muster.de, without mqtt:// and port. |
| "Keine Verbindung zum Broker …" (no connection) | Do port and encryption match? (8883 with TLS, 1883 without). Is port 8883 open on the broker – and allowed outbound on the web server? |
| "Benutzername oder Passwort falsch" / "Nicht autorisiert …" | Check the access on the broker; the user needs rights on the topic prefix. |
| "Ziele im internen Netz sind nicht erlaubt" | The broker must be reachable from the internet (public address). |
| "no status report from any cabinet yet" | Check the serial monitor: "MQTT-Fehler -2" = no connection (Wi-Fi, address, port), "MQTT-Fehler 4" or "5" = user or password. Are device ID and topic prefix the same in firmware and Tulz? After changing the prefix, download the firmware again. |
| No Wi-Fi | 2.4 GHz only; Wi-Fi name and password exactly as in the router. |
| Wrong drawer lights up | Go through each compartment with Show; adjust LED order or compartment assignment. Several LEDs per drawer: LEDS_PER_SLOT in the firmware. |
| Nothing lights up on issue | Does the tool have a storage location in an assigned drawer? Is the cabinet active and cabinet control enabled? |
| "Access on the Tulz broker could not be created" | The broker is not reachable right now – save again later. If the message persists, contact support. |
| Cabinet does not report after a new device ID | With the Tulz broker the access belongs to the device ID: download and flash the firmware again. |
| Lock does not open | Check the 12 V supply, common ground and MOSFET module; Release compartment (seconds) not 0. |
Security
The cabinet only accepts commands on its own topic; the broker requires username, password and TLS. A lock opens for at most 300 seconds and locks when unpowered (fail-secure) – the key always opens the cabinet. Who took something is recorded in Tulz as usual, not at the cabinet: the employee books the issue at the kiosk or on their own device. With the Tulz broker, every cabinet has its own access that may only read and write its own topics; no workshop sees another workshop's messages. Cabinet control is blocked in the demo company.